Serverless TypeScript
August 05, 2019
I love Serverless and TypeScript ❤. I also think Serverless is the best thing that has happened to the backend and TypeScript is the best thing that has happened to Node.js. So it makes sense combining the two to make something awesome.

Serverless has become extremely popular amongst the so-called cloud-native technologies. With the promise of only paying for what you use and automatic scaling, it sets the bar to a new high. You don’t have to worry about the infrastructure, just worry about your code.
At the same time JavaScript or more precisely Node.js has become one of the most popular languages for writing serverless applications. There are probably a lot of reasons for it, but I would guess that the popularity of JavaScript in serverless is due to some of their similarities: Both focus on fast time-to-market and both are particularly popular amongst frontend developers.
This post is a part of a larger TypeScript in the Back series. TypeScript is taking the web and JavaScript development world by storm and it has some interesting implications on how we do things.
This is the fourth and final part of the series.
Part 1: I’d Like Some Type in My Script Instead of Java, Please!
Part 2: Bringing the Types Back to the Back
Part 3: Types Are Not Tests and Tests Are Not Types
Part 4: Serverless TypeScript
Bring the Types Back to Serverless
JavaScript is a lot like serverless in the way that it tries to make writing software as frictionless as possible. Everything seems easy from the start. However, most of the time the trick is not how fast you can write new code, but how easily you can change the old code.
So maintainability and readability of the code become a real concern. With serverless and JavaScript you can move fast and create new things. It would be nice though if you could somehow balance moving fast and still making sure things work correctly and the code is easy to maintain.
Luckily there is a solution. Just like with regular JavaScript code, you can also use TypeScript instead of JavaScript with serverless. And just like in regular Node.js, TypeScript can provide you with some real benefits.
TypeScript with FaaS offerings

FaaS or Functions as a Service is the compute part of serverless. You can run your code (functions) in the cloud without having to know what VM or hardware the code is run on. You don’t have to worry about the underlying infrastructure at all, just the code you write and it’s dependencies.
Each of the three big cloud providers has their own FaaS offering. AWS has AWS Lambda, Azure has Azure Functions and Google has Cloud Functions. They all have the same basic idea and developing for them is pretty close to each other. All of them support JavaScript (Node.js) as a language as well as a varied range of other languages.
But how about TypeScript? That’s a whole another story.
Azure Functions has a very well documented support for TypeScript. They recently released new templates for writing TypeScript functions which makes it easy to get started.
AWS Lambda does not have official documentation about how to use TypeScript, but you can easily find unofficial posts about how to set up your TypeScript configuration. There are three approaches. First one is to just use TypeScript compiler or Webpack loader to compile TypeScript to JavaScript. Then all you have to do is to point the Lambda configuration to the correct JS file. Second is to use AWS SAM which makes configuring a bit easier. And the third is to use Serverless Framework which has a plugin for using TypeScript.
Google Cloud Functions also does not have instructions on their docs about what to do if you want to use TypeScript. Curiously enough though, Firebase Functions has this doc. You can also use the Serverless Framework plugin if you want to run your functions on Google Cloud Platform.
How To: TypeScript Azure Functions
A great starting point for creating your first TypeScript Azure Function is this Azure Blog Post. It details the simplest way to create a TypeScript App using either Azure Functions Core Tools or Azure Functions Extension for Visual Studio Code.
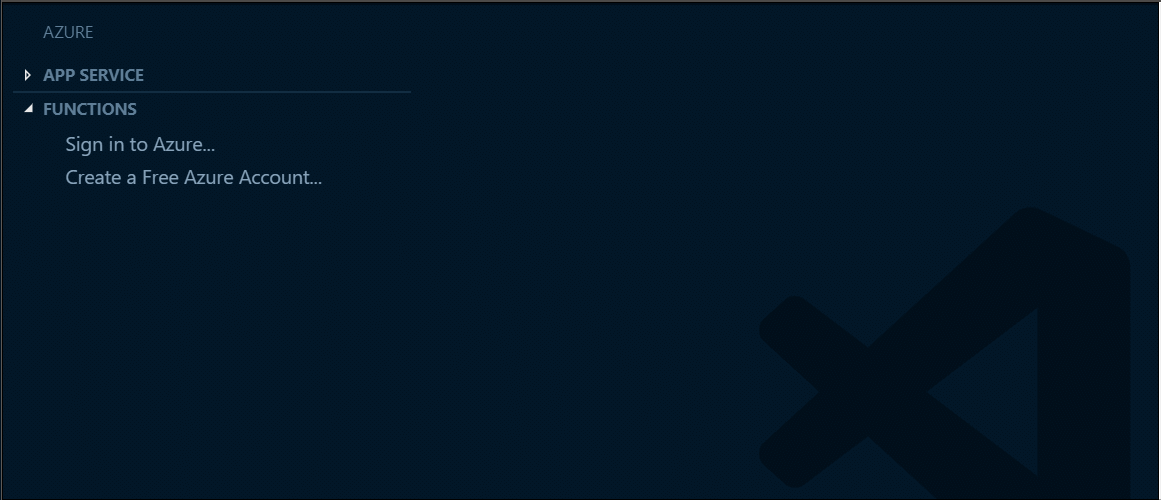
I use Visual Studio Code so much that I always use the Azure Functions extension for it to create new Function Apps.
It is really easy to create a new Azure Functions App and for example an HTTP trigger function:
What the extension creates is a folder with the following structure:
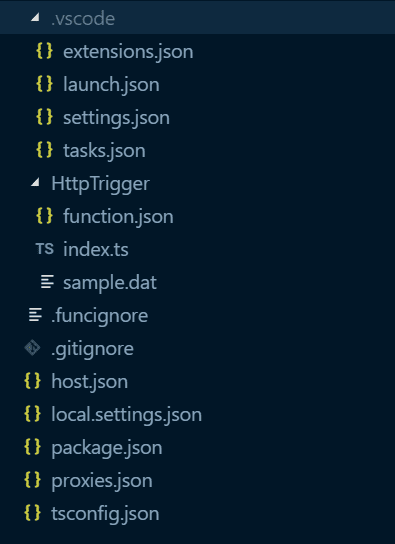
If you’re familiar with Azure Functions then this should look very familiar. The only new file is tsconfig.json.
tsconfig.json has the following content:
{
  "compilerOptions": {
    "module": "commonjs",
    "target": "es6",
    "outDir": "dist",
    "rootDir": ".",
    "sourceMap": true,
    "strict": false
  }
}
This is a nice starting point though I’d personally change the target to something a bit newer like es2017. And I would set strict to true. In Part 1 of this blog post series, I wrote about the reasons why I think the strict mode is great so you can go back read about it if you’re not yet convinced.
Also, take notice of the outDir property that is set to dist. We will need this later.
But this is not everything that is different. package.json has also changed. This is the content in a TypeScript function:
{
  "name": "ts-func",
  "version": "1.0.0",
  "description": "",
  "scripts": {
    "build": "tsc",
    "watch": "tsc -w",
    "prestart": "npm run build && func extensions install",
    "start:host": "func start",
    "start": "npm run start:host & npm run watch",
    "build:production": "npm run prestart && npm prune --production",
    "test": "echo \"No tests yet...\""
  },
  "dependencies": {},
  "devDependencies": {
    "@azure/functions": "^1.0.2-beta2",
    "typescript": "^3.3.3"
  }
}
The most important parts are the build and watch scripts. As you can see they both call the TypeScript compiler. Build to just compile the files and watch to start the compiler in a watch mode that listens to file changes.
Another thing to notice is that there are no additional typings installed. The @azure/functions package contains the TypeScript definitions needed.
Is there anything else? If we take a look at function.json, there’s a new property called scriptFile. Here’s the full content:
{
  "bindings": [
    {
      "authLevel": "function",
      "type": "httpTrigger",
      "direction": "in",
      "name": "req",
      "methods": ["get", "post"]
    },
    {
      "type": "http",
      "direction": "out",
      "name": "res"
    }
  ],
  "scriptFile": "../dist/HttpTrigger/index.js"
}
The scriptFile points to a JavaScript file in the dist directory. If you remember there was an outDir property in the tsconfig.json file that has the value of dist. This means that the compiled JavaScript files will be in that folder and since Azure Functions cannot run TypeScript but it can run JavaScript files, we need to tell it where the JavaScript files are.
Other than that, there is some magic in the tasks.json to enable debugging TypeScript functions. Usually, it’s nice that these are created automatically because messing with the VS Code files manually can be painful.
But what about the actual code? Here is the default HttpTrigger in TypeScript:
import { AzureFunction, Context, HttpRequest } from '@azure/functions'

const httpTrigger: AzureFunction = async function(
  context: Context,
  req: HttpRequest
): Promise<void> {
  context.log('HTTP trigger function processed a request.')
  const name = req.query.name || (req.body && req.body.name)

  if (name) {
    context.res = {
      // status: 200, /* Defaults to 200 */
      body: 'Hello ' + (req.query.name || req.body.name),
    }
  } else {
    context.res = {
      status: 400,
      body: 'Please pass a name on the query string or in the request body',
    }
  }
}

export default httpTrigger
The default implementation shows how the function itself, context and HTTP request are all strongly typed. This means that not only can you make your code typed, the actual function and its parameters are also typed. This makes it easy to avoid annoying errors and also to know what properties and methods context and request have. Pretty cool! 😎
With the support for TypeScript in the Visual Studio Code extension, it is really easy to get going.
How To: TypeScript AWS Lambda
💡 I have much more experience with Azure Functions than other serverless platforms, so my AWS and Google examples can be less perfect. But they are my best effort at showing how you can work with them and TypeScript.
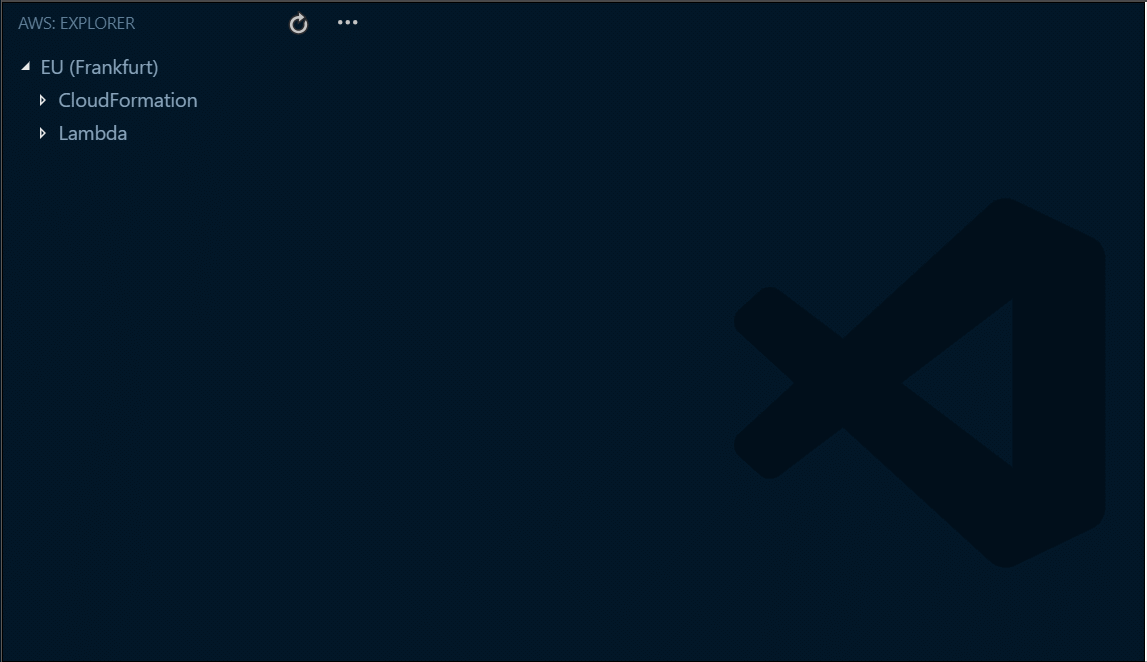
With AWS Lambda you don’t have one clear way to go forward with TypeScript. However, it seems AWS SAM is the new and preferred way to write serverless applications. There is also an extension for Visual Studio Code called AWS Toolkit that works similar to the Azure Functions extension. You can from Visual Studio Code create, run and debug your functions locally.o
Unfortunately, unlike with the Azure Functions extension, there is no option for creating a TypeScript function. But we can use the plain Node.js function as a starting point:
Warp to TypeScript!
Now that we have our hello world example Node.js function created, it needs to be converted to TypeScript.
💡 This is the simplest way to transform to TypeScript. It is far from the best and most complete way to do it. You can find other TypeScript examples on GitHub that for example use Webpack. I wanted to keep this example as simple as possible.
The steps needed to convert the basic Node.js function to a TypeScript function are:
- Install the required packages
- Initialize TypeScript config
- Set build script
- Update SAM config
- Convert code to TypeScript
- Build
- Run! 🔥
1. Install required packages
We install the required packages with:
npm install --save-dev typescript @types/node @types/aws-lambda💡 Note that you will want to be in the correct directory when running this command. Make sure you are in the same directory as the generated package.json file.
We need typescript but we also need typings for AWS Lambda in the @types/aws-lambda package. Adding Node.js typings is always a good idea too. You need the typings at least for Promises.
2. Initialize TypeScript config
Let’s create and initialize tsconfig.json:
npx tsc --initSince we installed TypeScript only locally in the project, we need to call the compiler tsc with npx. With option --init the tool creates a default tsconfig.json.
The default config file is quite bloated with all the comments and commented out properties. But what we’re interested in, is the outDir property. So uncomment that line and set it’s value to dist.
"outDir": "dist"3. Set build script
Ok, now the next step is to add the script that we will use to build our TypeScript function to JavaScript. In the scripts section of package.json add the following script:
"build": "tsc"4. Update SAM config
The fourth step is to update the SAM config (template). We need to change the CodeUri property of our function in the template.yaml file to ./{NAME_OF_FUNCTION}/dist/ where NAME_OF_FUNCTION is the name you gave your function when creating the app.
For example your function configuration might look like this:
Resources:
 HelloWorldFunction:
 Type: AWS::Serverless::Function
 Properties:
 CodeUri: ./hello-world/dist/
 Handler: app.lambdaHandler
 Runtime: nodejs10.x
 Events:
 HelloWorld:
 Type: Api
 Properties:
 Path: /hello
 Method: get
5. Convert code to TypeScript
Finally, we get to change to code to TypeScript. Here’s the code we start in JavaScript:
let response

exports.lambdaHandler = async (event, context) => {
  try {
    response = {
      statusCode: 200,
      body: JSON.stringify({
        message: 'hello world',
      }),
    }
  } catch (err) {
    console.log(err)
    return err
  }

  return response
}
And converted to TypeScript it looks like this:
import { APIGatewayEvent, Context, ProxyResult } from 'aws-lambda'

let response: ProxyResult

export const lambdaHandler = async (
  event: APIGatewayEvent,
  context: Context
): Promise<ProxyResult> => {
  try {
    response = {
      statusCode: 200,
      body: JSON.stringify({
        message: 'hello world',
      }),
    }
  } catch (err) {
    console.log(err)
    return err
  }

  return response
}
Quite straightforward, there are just some AWS Lambda types added: APIGatewayEvent, Context and ProxyResult.
Most of the code is strongly typed now, and you will get a type error if you, for example, try to set some property to the response that does not exist.
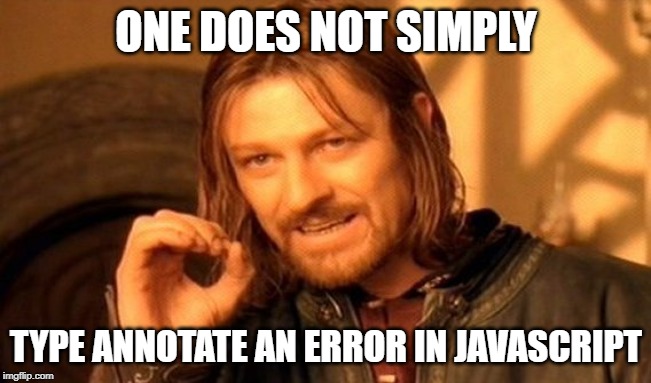
However, there is one interesting thing to notice. The err variable in our catch block does not have a type annotation and will implicitly have a type any. Since we have the compiler option strict set to true, implicit any should result in a compiler error. So what’s going on?
Turns out that if you try to annotate the err variable with for example Error like so:
catch (err: Error)You will get a compiler error: Catch clause variable cannot have a type annotation.
At first, this might seem crazy, but in JavaScript catching and throwing is quite dynamic so it’s hard to put types on it. You can throw anything in JavaScript and from pretty much anywhere. So knowing what kind of values get thrown inside a try-catch block is almost impossible.
It seems that the TypeScript team has opted to leave type annotations out of catch clauses and just leave it up to the developer to later cast the variable as they see fit.
Also, I think type annotations in catch clause are avoided because it might confuse people who are used to languages with catch clauses that can be set so they only catch a certain type of errors. Remember, that in TypeScript the types only exist in compile-time and exceptions are thrown in runtime. There is no way for the JavaScript runtime to know what type of error was thrown.
6. Build
Now that we have everything set up, we are ready to build our code:
npm run buildIf all goes well you should end up with an app.js file inside a dist directory inside your lambda directory.
7. Run! 🔥
Great! Everything is set, and all we have to do is to run our function! But wait, it seems that the AWS Toolkit is not giving us nice options for running and debugging functions locally. It looks like the features integrated to Visual Studio Code only support JavaScript and not TypeScript. I’m not sure if there is a way around this, but hopefully, we will get support for TypeScript in AWS Toolkit soon.
Luckily, we can still run the function locally using AWS SAM CLI. Just navigate to the directory with the template.yaml file and type:
💡 The following requires you to have AWS SAM CLI installed (https://docs.aws.amazon.com/serverless-application-model/latest/developerguide/serverless-sam-cli-install.html)
sam local invoke --no-eventIf it all works out you should see the following response:
{ "statusCode": 200, "body": "{\"message\":\"hello world\"}" }AWS conclusion
I’ll admit AWS Lambda with TypeScript feels a bit hacky for the moment. The lack of official documentation and support from tools shows, and you kinda have to figure it out as you go.
But then again that’s what it was like in Azure Functions before the official support was added to the tooling.
I’m confident that as the popularity of TypeScript continues to grow, we will see better support for it in AWS Lambda also.
How To: Google Cloud Functions
Ok, so we’ve got the final one of the three big ones left: Google Cloud Functions.
The most confusing thing about Google Cloud Functions is that there is also a thing called Cloud Functions for Firebase. So you can create a cloud function directly in the Google Cloud Platform or you can use the Firebase tools. Which one should you choose?
I don’t know for sure. It seems Firebase provides a thin wrapper around Cloud Functions so that you use them easier and with the other Firebase services. Other than that I guess it depends on if you’re already using one or another.
There’s also something called Functions Framework that makes it easier to deal with JavaScript functions.
At the time I’m writing this, there does not seem to be an extension for Visual Studio Code that would integrate it with cloud functions.
Functions Framework
I like the modern serverless tooling that makes development so much easier. After working so long with Azure Functions, it is almost a minimum requirement personally that you can run and test your cloud functions locally without deploying them first.
That’s why Functions Framework seems interesting to me. It is a replacement for Cloud Functions Node.js Emulator which is now deprecated.
But can you use it with TypeScript? Let’s find out!
First, we will just create a new folder and index.ts file inside of it:
mkdir my-func
cd my-func
touch index.ts
Then we will initialize our app for NPM and install the Functions Framework package and TypeScript:
npm init -y
npm install @google-cloud/functions-framework
npm install --save-dev typescript
The functions framework includes all the typings we need, including the typings of its dependencies like express.
Next, we add the following code to index.ts:
import { Request, Response } from 'express'

export const helloWorld = (req: Request, res: Response): any => {
  res.send('Hello, World')
}
Then we need to initialize TypeScript:
tsc --initThis time we can just leave the tsconfig.json to its default.
Let’s add build and start NPM scripts to package.json:
"scripts": {
 "build": "tsc",
 "start": "functions-framework --target=helloWorld"
}
Build runs the TypeScript compiler and start runs the Functions Framework tool.
So let’s give it a try:
npm run build
npm start
You should see the following which means that the function is running:
Serving function...
Function: helloWorld
URL: http://localhost:8080/
Now we can send a request from another window:
curl localhost:8080Which should result in:
Hello, WorldWith the Functions Framework, creating a TypeScript Google Cloud Function and running it locally is just that easy.
Bonus Round: Serverless Framework
There is one more way to create TypeScript serverless apps and it’s the Serverless Framework. Serverless Framework is pretty popular, especially with AWS Lambda, and since many developers mainly use it to write their serverless apps, I felt it was appropriate to look at how TypeScript works with it too.
The way you create a new serverless app with Serverless Framework is by first choosing the right template. For AWS there is a built-in template called aws-nodejs-typescript. The way you create an app using that template is:
💡 Before running this you will need to install Serverless Framework CLI with
npm install --global serverless
serverless create -t aws-nodejs-typescriptThe template creates something pretty close to what we had in our AWS example. Here is the file structure:
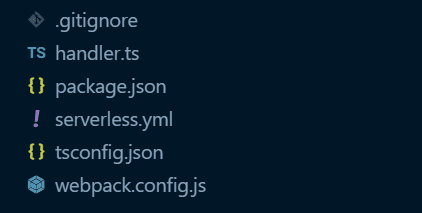
The main difference to what we did before is the addition of webpack.config.js. Serverless Framework uses Webpack to bundle the files which optimize the cold-start time for AWS Lambda.
There’s also a serverless.yml file which is the configuration for Serverless Framework:
service:
  name: ser-ver-less
#app: your-app-name
#tenant: your-tenant-name

# Add the serverless-webpack plugin
plugins:
  - serverless-webpack

provider:
  name: aws
  runtime: nodejs10.x

functions:
  hello:
  handler: handler.hello
  events:
    - http:
  method: get
  path: hello
This resembles the AWS SAM config a lot. It lets Serverless Framework tooling know about what functions we have and what runtime and platform they run on.
To test our function we can do the following:
npm install
serverless invoke local --function hello
After it runs webpack you should see the following message or something equivalent:
{
  "statusCode": 200,
  "body": "{\n \"message\": \"Go Serverless Webpack (Typescript) v1.0! Your function executed successfully!\",\n \"input\": \"\"\n}"
}
So this is the Serverless Framework way if you prefer it. I didn’t try it, but there seem to be plugins for creating TypeScript functions that can be run in Google Cloud Platform also.
What did we learn today?
This has to be by far the longest blog post I’ve ever written and there’s a ton of stuff here. I don’t expect anyone to just read all of it and absorb it immediately. Hopefully, this can work as a reference for those who are interested in using TypeScript with serverless.
Also if you were not convinced about TypeScript in serverless before, then maybe this series has helped with that also. I recommend you at least give TypeScript a chance if you’re doing serverless with JavaScript (Node.js).
In any case, absolute kudos to anyone who made it till the end of the post.

TypeScript in the Back Series
This was the fourth and the final part of my blog post series about TypeScript. I hope you have enjoyed the series! One thing is sure, this will not be my last blog post about TypeScript though!
Part 1: I’d Like Some Type in My Script Instead of Java, Please!
Part 2: Bringing the Types Back to the Back
Part 3: Types Are Not Tests and Tests Are Not Types
Part 4: Serverless TypeScript